
You've probably done this under time pressure: a folder full of receipt photos, a few screenshots, maybe a scan from your phone, and someone wants one PDF. Not six JPGs, not a ZIP file, not a chain of attachments. Just one clean document that opens everywhere and looks like you meant to send it that way.
That's where image to PDF stops being a tiny utility task and becomes a document workflow. The conversion itself is usually easy. The part that trips people up is everything around it: page order, mixed orientations, file size, privacy, and whether the result still looks professional when someone prints it.
A good workflow should let you combine images quickly, keep them readable, and avoid creating a messy PDF with random margins and upside-down pages. That matters whether you're submitting coursework, sending an expense packet, storing invoices, or assembling a report appendix.
Table of Contents
- Why Convert an Image to PDF Anyway
- The Fastest Method Using an Online Image to PDF Converter
- How to Convert Images to PDF with Built-in Tools
- Choosing Your Method Online vs Native Tools
- Pro Tips for Professional Document Assembly
- Next Steps Compress Merge and Secure Your New PDF
- Frequently Asked Questions About Image to PDF Conversion
Why Convert an Image to PDF Anyway
The most common reason is simple. People don't want a pile of image files. They want one document.
If you're sending reimbursement receipts, a PDF keeps everything together. If you scanned a multi-page assignment with your phone, a PDF preserves the sequence. If you're sharing product screenshots with comments in email or storing records in a shared drive, PDF fits the way teams already exchange documents.
That isn't just habit. The PDF format sits at the center of ordinary digital paperwork. The PDF Association's 2018 paper reported 73 million new PDF files saved every day in Google Drive and Gmail, and noted that 60% of non-image attachments in Outlook were PDFs in its PDF statistics report. That tells you why image to PDF matters so much in real life. Images often need to become PDFs because PDF is the format people already expect for sharing, storage, and review.
A single file is easier to work with
Five receipt photos create friction. One PDF doesn't.
A single PDF is easier to email, archive, rename, approve, and reference later. It also reduces the chance that someone misses page three because it was attached as a separate image with an unhelpful filename.
PDF looks more intentional
A PDF reads like a document. A folder of images reads like raw material.
That difference matters when you're sending invoices, signed forms, onboarding paperwork, or a portfolio draft. Even when the content started as phone photos or screenshots, the PDF wrapper makes it easier for another person to review it in order.
Practical rule: Convert to PDF when the images together represent one document, one submission, or one record.
You'll also run into fewer compatibility issues. Users can open a PDF on any device without wondering whether they should save each image separately, rotate them manually, or print them one by one.
If you handle routine document work, it's worth browsing more workflow ideas in the PDF Birds blog library. The core lesson is straightforward: image to PDF isn't a niche trick. It's part of everyday document handling.
The Fastest Method Using an Online Image to PDF Converter
When speed matters, a browser-based converter is usually the shortest path from scattered images to one finished PDF.
When an online converter makes sense
This approach works well when you're on a borrowed computer, switching between phone and laptop, or just don't want to dig through native print menus. You open the tool in a browser, add your images, let it process them, and download the PDF.
That's also why many people prefer web tools for mixed image sets. You may have JPG photos from a phone, PNG screenshots from a desktop, and a scan exported in another common image format. An online image to PDF converter usually handles those together without asking you to normalize everything first.
Some tools also make document assembly easier than native options. Mainstream help pages often focus only on upload and convert, but in practice people need ordering, page sizing, and orientation controls when combining receipts, screenshots, and scans into one file. That's a more realistic workflow than one-off conversion.
A simple four-step workflow
The cleanest browser workflow is this:
Select your images
Choose the files that belong in the final document. If possible, gather them in one folder first.Upload them in the intended order
If the tool allows drag-to-reorder, use it before conversion. This matters more than people think.Run the conversion
Let the tool assemble the pages into a single PDF.Download and review the result
Open the PDF immediately and inspect page one, a middle page, and the last page.
One browser-based option is PDF BIRDS, which provides an image to PDF converter in a standard four-step flow: select, upload, process, and download. It's fully web-based, works across devices, and doesn't require an account.
A short demo is often easier than reading another paragraph. Here's what that workflow looks like in action.
What works well with online tools is convenience. What doesn't work well is treating them like a black box. If the image order is wrong before conversion, the PDF will usually be wrong after conversion too.
If your document has more than a couple of pages, assume the first export needs a quick review.
A few practical habits make browser conversion reliable:
- Rename files first so the order is obvious.
- Remove duplicates before upload.
- Rotate problem images before conversion if the tool doesn't fix orientation well.
- Check margins and scaling if the PDF might be printed later.
For everyday tasks, this method is usually the fastest. For highly sensitive material, privacy handling deserves more attention, which is where native and local-processing options enter the conversation.
How to Convert Images to PDF with Built-in Tools
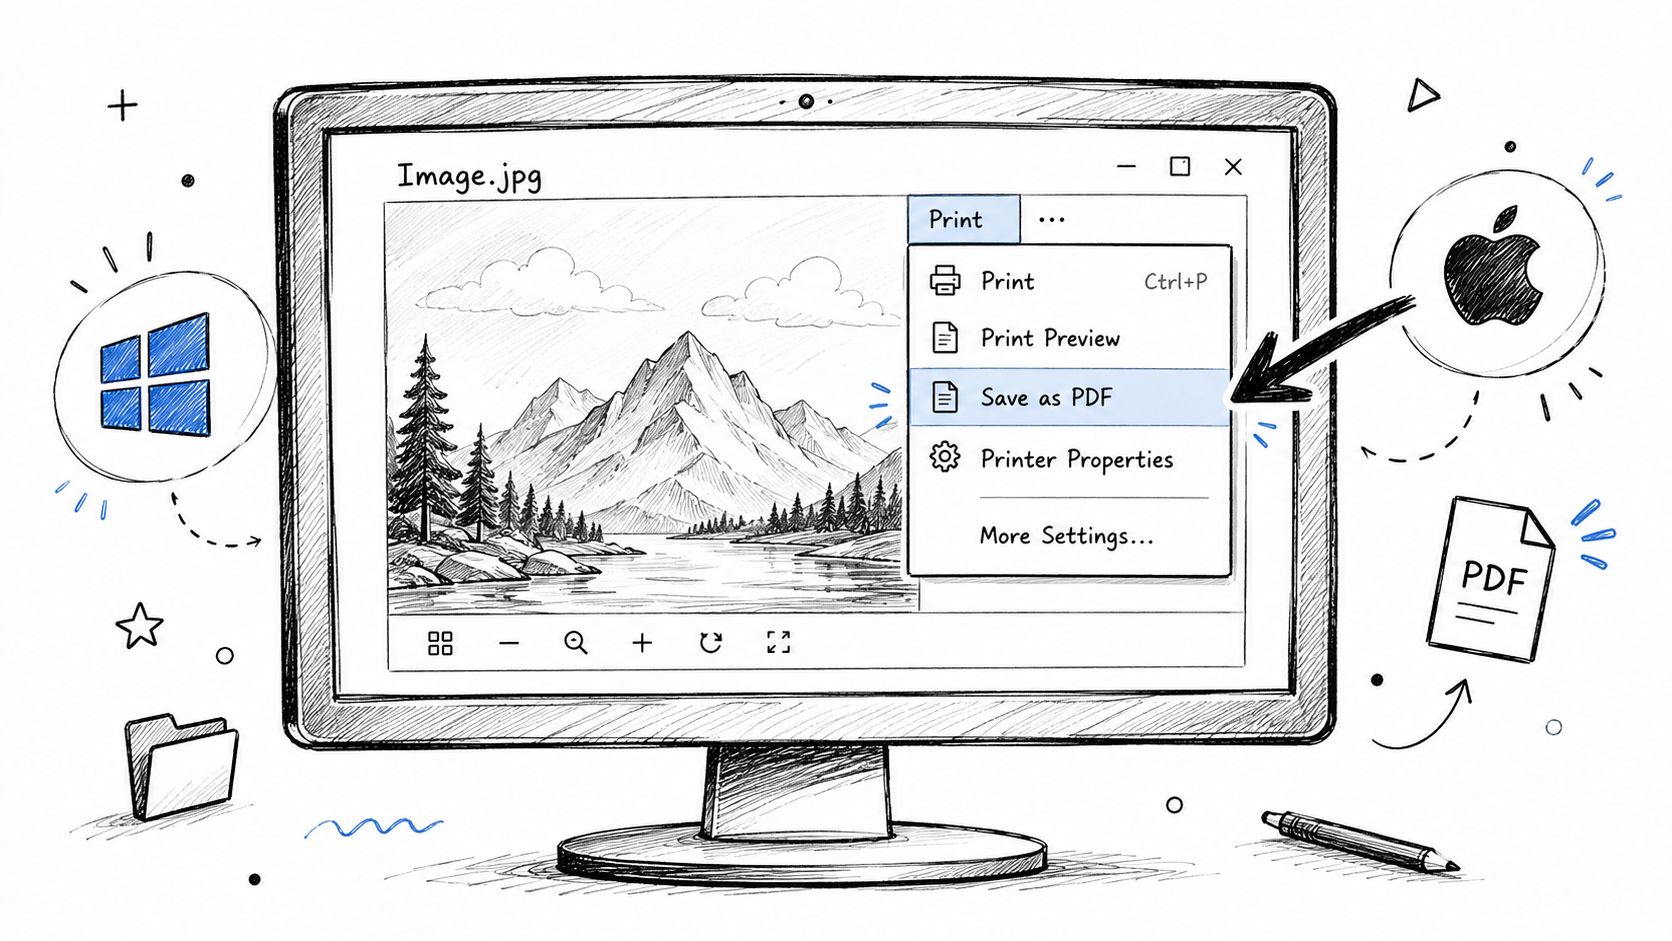
Built-in tools are useful when you want to work locally, avoid uploads, or use the features already sitting on your device. They're also the direct continuation of the older print-and-export workflow. Microsoft community guidance describes using Ctrl+P and Microsoft Print to PDF for single or multiple images, a good example of how image to PDF became a normal operating system task rather than a specialist feature in this Windows discussion.
If you want other browser-based and native-style utilities in one place, the PDF Birds tools category is a useful directory. For built-in conversion, though, the steps below are usually enough.
Windows
Windows makes this easier than many people expect.
For a single image, open it in the default image viewer, press Ctrl+P, and choose Microsoft Print to PDF as the printer. Then pick paper size, layout, and save location.
For multiple images, select them in File Explorer, right-click, choose Print, and work through the print dialog. Windows can combine them into one PDF.
What works:
- Quick one-off conversions
- No extra software
- Simple local workflow
What doesn't:
- Limited control over mixed layouts
- Easy to miss scaling issues
- Less convenient reordering once you're in the dialog
If the images have different shapes, review the preview carefully. A wide screenshot and a portrait scan often don't look balanced with default settings.
macOS
Preview is more capable than many users realize.
Open the images in Preview. If they open as separate windows, select them in Finder first and open them together. In the sidebar, drag thumbnails into the right order. Then use the print menu or export flow to create a PDF, depending on your setup and preferred method.
The advantage on Mac is the thumbnail sidebar. It makes it easier to see the whole document before export, especially for scanned pages and receipts.
A few practical checks help here:
- Reorder in the sidebar before export.
- Rotate any sideways page while you can still see the thumbnails.
- Scan for odd page dimensions if some files came from screenshots and others from a scanner.
Preview is often the better choice when your job is really “assemble pages” rather than “convert files.”
iPhone and iPad
On iOS and iPadOS, the easiest route is usually through the Share or Print workflow from Photos or Files.
Select the images you want, choose Share, then look for Print or a save-to-PDF style option depending on the app and version. From there, you can generate a PDF and save or share it.
This works well for:
- receipts photographed on the spot
- homework pages scanned with a phone
- travel documents you need to send quickly
The weak point is control. Mobile workflows are convenient, but not always ideal for fine-tuning order, page size, or mixed orientations.
Android
Android varies more by device brand and app, but the pattern is similar. Open the images in Gallery, Photos, or Files, choose Share or Print, then select Save as PDF or an equivalent PDF output option if available.
If your phone's built-in apps feel limited, a web tool can be easier than hunting through device-specific menus. That's especially true when you need to combine several images into one document in a precise order.
Choosing Your Method Online vs Native Tools
The right method depends less on “which tool is best” and more on what kind of job you're doing. A casual set of screenshots for internal sharing has different requirements from a packet containing IDs, contracts, or financial records.
What matters most in practice
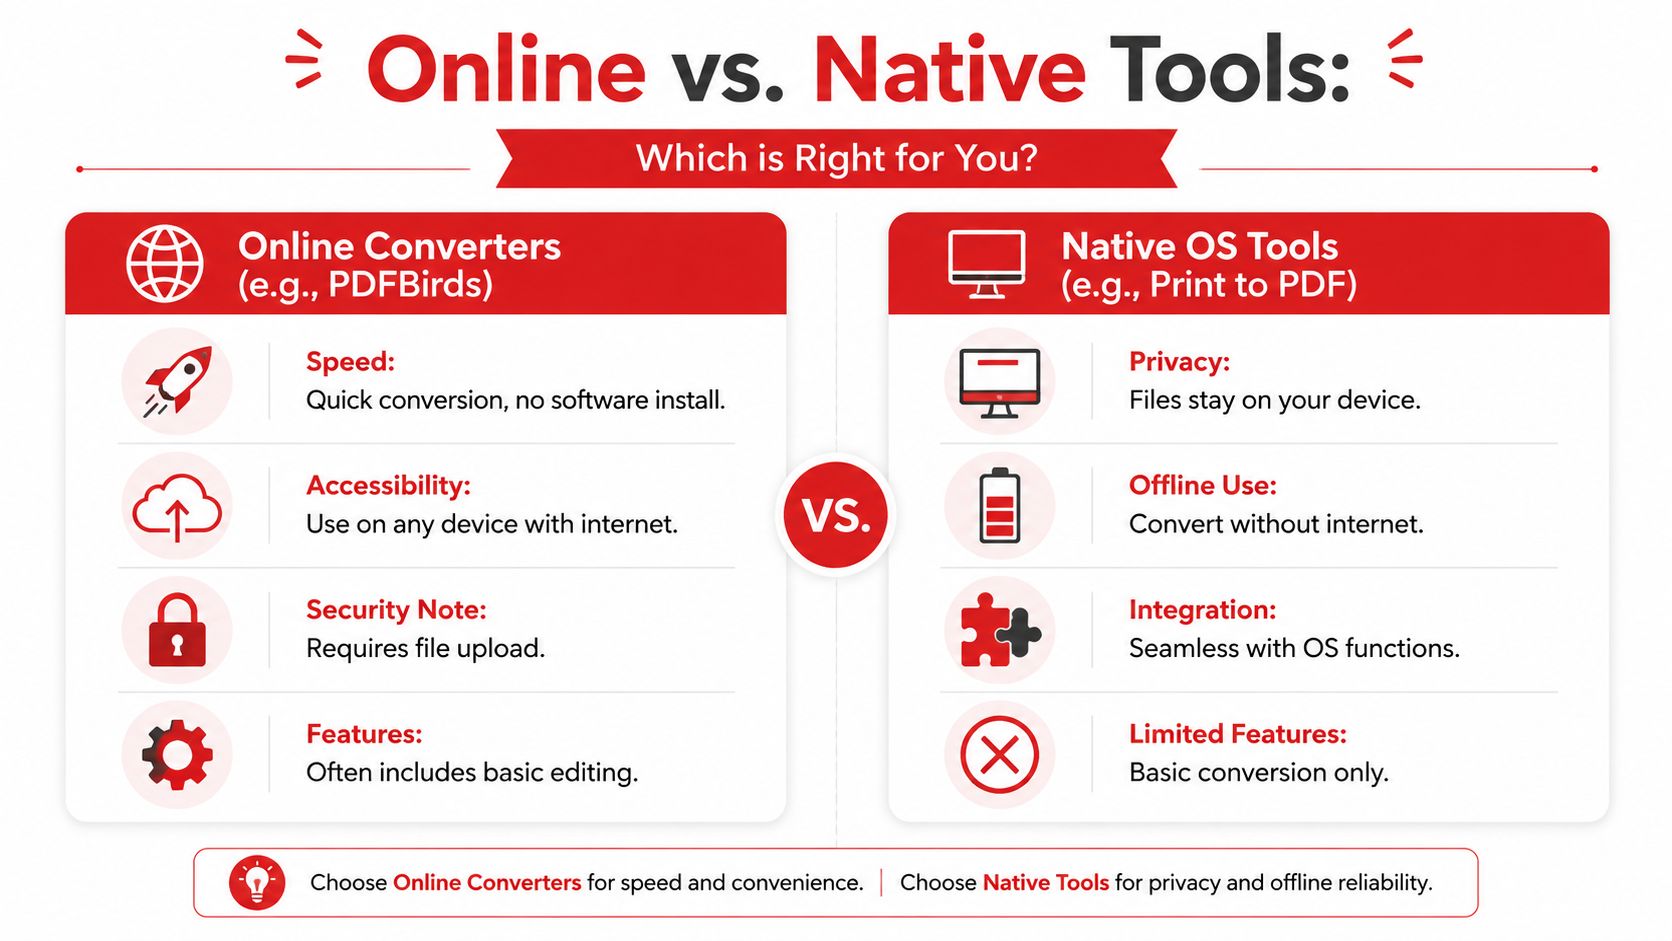
Privacy is one of the clearest dividing lines. Some image to PDF tools process files locally in the browser with no upload required, while others use secure server-side processing. For sensitive images such as passports or contracts, understanding where files go matters as much as the conversion itself, as noted on the ihatepdf privacy-focused image to PDF page.
Convenience points the other way. Online tools are usually easier when you're moving across devices, don't want software setup, or need a cleaner interface than a print dialog provides. Native tools win when you want your files to stay on your own device and you don't need advanced layout help.
One useful comparison point is how broader PDF work continues after conversion. If your next task is editing or repurposing the resulting file, guides like this PDF to Word conversion overview help clarify what kind of ecosystem you want around the initial image to PDF step.
Image to PDF Conversion Methods Compared
| Feature | Online Tool (PDFBirds) | Windows (Print to PDF) | macOS (Preview) | Mobile (iOS/Android) |
|---|---|---|---|---|
| Setup | Open in browser | Built into system | Built into system | Built into system apps on many devices |
| Best use case | Fast conversion across devices | Quick local conversion on PC | Local assembly with thumbnail review | On-the-go conversion from phone images |
| Multi-image handling | Usually straightforward | Possible, but less elegant | Good visual control in sidebar | Works, but can feel limited |
| Reordering pages | Often easier in web UI | Limited in print flow | Easy before export | Varies by app |
| Layout controls | Often available in dedicated tools | Basic | Moderate | Usually basic |
| Internet required | Yes, unless tool processes locally in-browser | No | No | Not always |
| Privacy model | Depends on tool and processing method | Files stay on device | Files stay on device | Files usually stay on device unless using cloud apps |
Use this rule of thumb:
- Choose online when speed, cross-device access, and smoother batch handling matter most.
- Choose native when privacy and offline use come first.
- Choose local-browser processing tools when you want web convenience without normal upload concerns.
No method wins every time. The practical choice is the one that matches the sensitivity of the images and the amount of document assembly you need.
Pro Tips for Professional Document Assembly
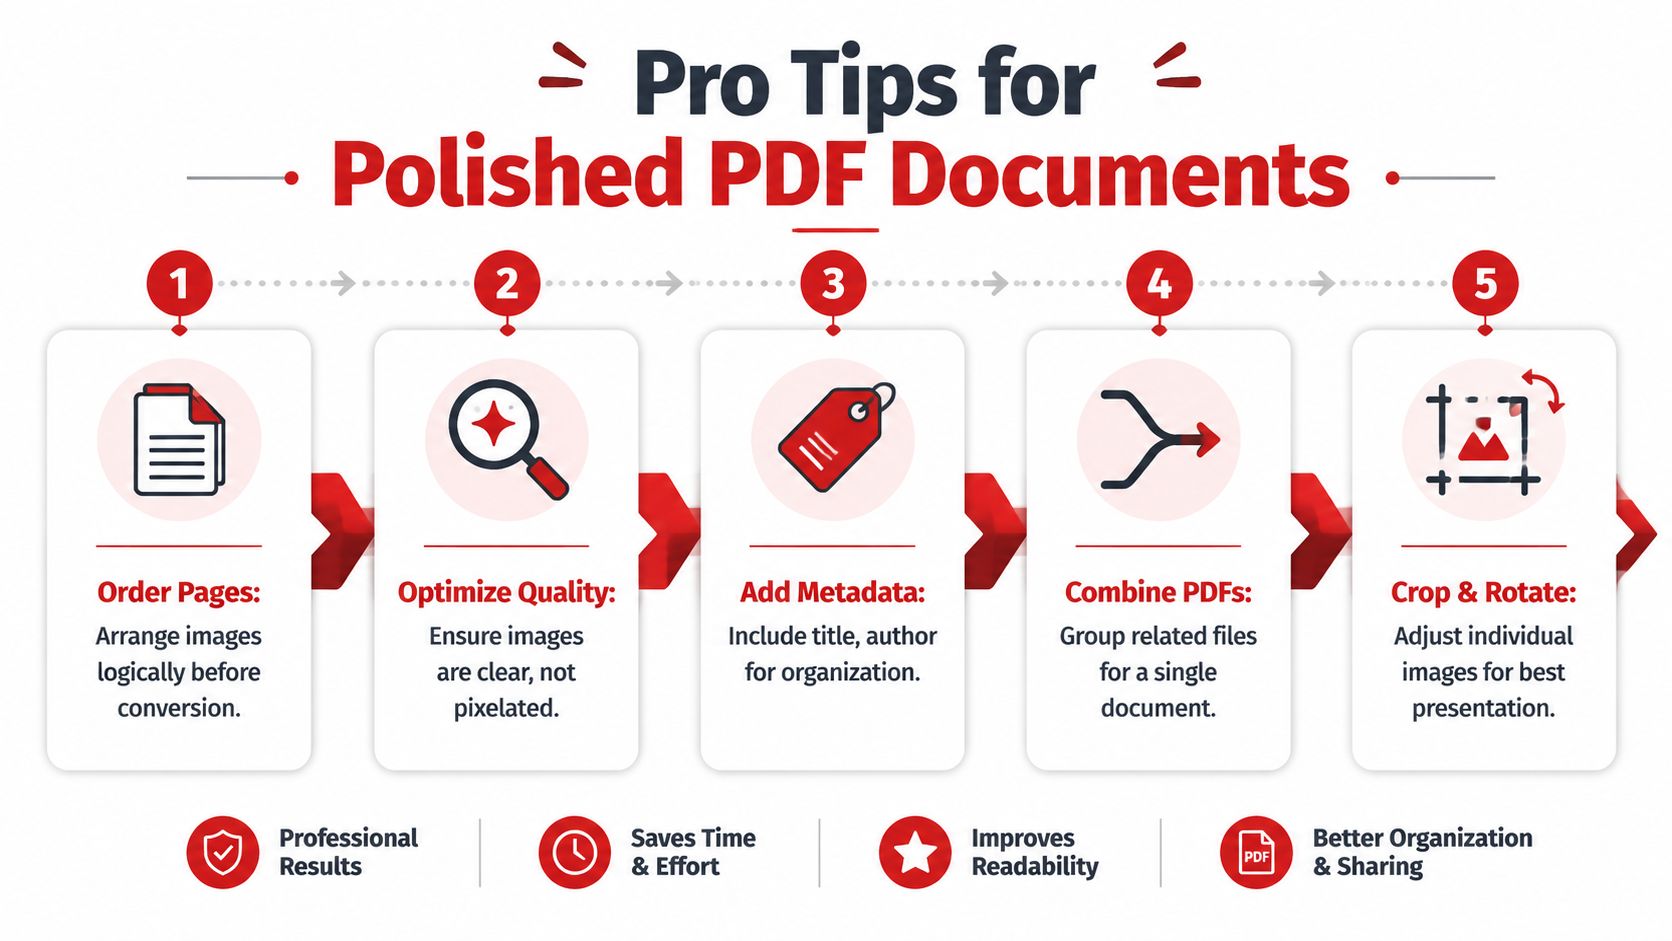
Most weak PDFs don't fail because the conversion broke. They fail because nobody assembled the pages thoughtfully.
Users often need to combine screenshots, phone photos, receipts, and scanned pages into one document, yet many image to PDF guides barely discuss page sizing, orientation, image ordering, or whether to preserve original dimensions. That's why document assembly deserves its own workflow rather than being treated like a one-click afterthought.
Start before you convert
The easiest way to fix page order is to fix it before conversion.
Rename files in a clear sequence:
01-cover02-receipt-lunch03-receipt-taxi04-approval-email
That small step prevents the classic mistake where a phone sorts files by capture time while your desktop sorts them alphabetically.
You should also remove near-duplicates. If you photographed the same form twice, decide which one is sharper before you create the PDF. Otherwise you end up editing after the fact.
Better filenames beat post-conversion repair almost every time.
Handle mixed image sets deliberately
Mixed sources create ugly PDFs fast. A tall scan, a wide screenshot, and a crooked phone photo don't naturally belong on matching pages.
When possible, decide which of these approaches fits your document:
| Situation | Better choice |
|---|---|
| Formal packet, meant for print | Consistent page size and orientation |
| Visual reference set, meant for screen viewing | Preserve image dimensions where readability matters |
| Receipts and proof documents | Prioritize legibility over uniform appearance |
| Report appendix with screenshots | Keep screenshots large enough to read without zooming excessively |
A practical browser workflow should preserve the source image's native pixel dimensions unless you intentionally resample it. Adobe's online guidance also notes that with multi-image jobs, page order should be set before conversion and the output should be checked for sizing and layout in its JPG to PDF workflow page.
What usually works:
- Keep screenshots large enough for text to remain readable.
- Rotate every page upright before final export.
- Use one orientation when the document will be printed or formally reviewed.
What usually doesn't:
- mixing pages with different orientations randomly
- shrinking detailed screenshots too aggressively
- trusting default page fitting without checking margins
Check the output like a reviewer would
Open the final PDF and inspect it the way the recipient will.
Start with three spots:
- the first page
- a middle page with the most detail
- the final page
You're checking for the issues that make a document feel sloppy:
- pages out of order
- sideways images
- giant white margins
- blurry text in screenshots
- a cover page that looks different from everything else
If the PDF is for contracts, reports, or anything archival, validate the first and last pages carefully. That's where mistakes often hide. A wrong first page confuses the reader immediately, and a wrong last page can leave out a signature, total, or appendix reference.
One more thing matters here: file size. Large image-heavy PDFs can become annoying to share. If your finished document is readable but too heavy for email or upload limits, compress it after assembly rather than over-compressing the source images first. That keeps your editing options open.
Next Steps Compress Merge and Secure Your New PDF
A finished PDF still may not be ready to send.
The usual problems show up right after export. The file is too large for email, the pages need to be combined with supporting documents, or the document includes sensitive material that should not be shared as-is. This stage matters because the PDF people remember is the one they receive, open, and file away.
Compress before you send
Image-based PDFs get heavy fast, especially when they come from phone photos, scans, or long screenshot sets. Large files slow down uploads, fail on client portals, and make mobile viewing annoying.
Compress the final PDF, not the source images. That preserves flexibility while you are still arranging pages. After compression, check the pages that matter most: receipt totals, small text in screenshots, signatures, and any page someone may print. If those details soften or break apart, dial the compression back.
Merge and protect when the job requires it
Many PDFs are only one piece of the packet. You may need to add a cover page, terms, an appendix, or a signed form after the image conversion is done. A merge tool then becomes part of the same workflow. It is faster than rebuilding the whole file from scratch, and it gives you more control over final page order.
Security deserves the same practical review. For travel receipts, public-facing handouts, or simple reference docs, convenience usually wins. For IDs, bank records, employee documents, contracts, or anything with account details, choose a more careful path. An offline tool is often the safer option if the contents are sensitive. If you use a web service, check how files are handled before upload.
If you want one browser workflow for conversion, assembly, compression, and protection, PDF BIRDS tools for image-to-PDF and follow-up tasks keep those steps in one place. The benefit is not just speed. It is consistency when you are working with mixed files and trying to deliver a clean, organized PDF without bouncing between apps.
The practical rule is simple: finish the document, then finish the job. Compress for sharing, merge for completeness, and secure it based on what the file contains.
Frequently Asked Questions About Image to PDF Conversion
Does converting an image to PDF reduce quality?
Not automatically. Quality usually depends on the original image, the conversion settings, and whether the PDF gets compressed afterward. If the source image is blurry, the PDF won't fix it. If the converter preserves the original dimensions well, the PDF can look virtually the same as the source.
Why is my image to PDF file so large?
Large files usually come from high-resolution phone photos, multiple pages, or a document with many screenshots. A PDF can also grow if each image is placed on a large page without optimization. Compressing the finished PDF is often the cleanest fix.
Is it safe to use an online image to PDF converter?
It can be, but you should check how the service handles files. The important questions are whether files are uploaded, whether processing happens locally in the browser or on a server, and whether files are deleted after processing. The PDF BIRDS FAQ page is the kind of place to review handling details before using any online tool for sensitive documents.
Can I combine multiple images into one PDF in the right order?
Yes. In most tools, the order of the uploaded images becomes the page order in the PDF. That's why renaming files and checking the sequence before conversion saves time later.
If you need a fast way to convert images, organize pages, compress large files, or secure a finished document, try PDF BIRDS for your next PDF workflow.